java 와 spring 을 이용한 헥사고날 아키텍처(hexagonal architecture)
java 와 spring 을 이용한 헥사고날 아키텍처(hexagonal architecture)
Allow an application to equally be driven by users, programs, automated test or batch scripts,
and to be developed and tested in isolation from its eventual run-time devices and databases.
– Alistair Cockburn 2005, Ports and Adapters
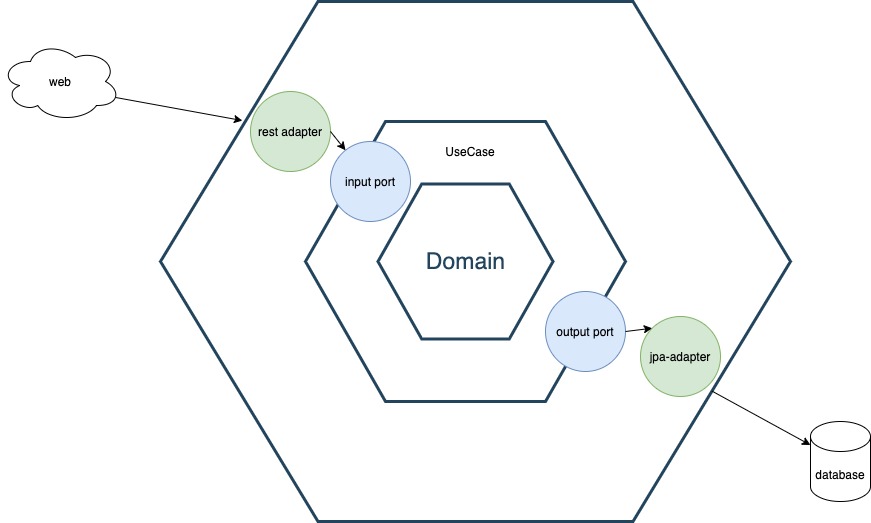
Hexagonal Architecture 의 주요 기능은 구성 요소 간의 종속성이 도메인 개체 안쪽 으로 향한다는 것입니다.
도메인 개체는 외부 종속성이 없어야 된다. 순수 java 로 만들어야 하며 유즈케이스에 대한 인터페이스(API)를 제공한다.
이런 인터페이스를 포트라고 부른다.
이렇게 되면 도메인 모델은 Robert C. Martin이 그의 저서와 블로그에서 이야기 했던 클린아키텍처에 가까워 질 수 있다.
- 프레임워크 독립적 : 클린 아키텍처는 소프트웨어 라이브러리 존재 여부에 의존하지 않는다.
- 테스트 용이 : 비즈니스 규칙은 UI, 데이터베이스, 웹 서버, 기타 외부 요인없이 테스트가 가능하다.
- UI 독립적 : 시스템의 나머지 부분을 변경할 필요 없이 UI를 쉽게 변경할 수 있다.
- 데이터베이스 독립적 : 비즈니스 규칙은 데이터베이스에 얽매이지 않는다.
- 외부 기능 독립적 : 비즈니스 규칙은 외부 세계에 대해 아무것도 모른다.
위에 내용을 다양한 패턴의 적용을 통해서 완성할수 있다.
- Adapter
- Model-View-Controller
- test double
- Checks
- Dependency Injection and spring
예제
그럼 위에 컨셉을 가지고 코드를 구성해 보았다 멀티 모듈 구성으로 작업을 했지만 해당 구성은 다양하게 적용해볼수 있을것 같다.
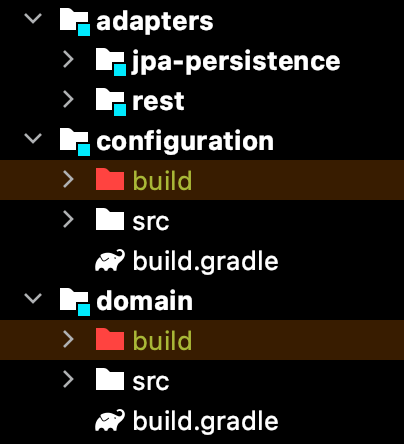
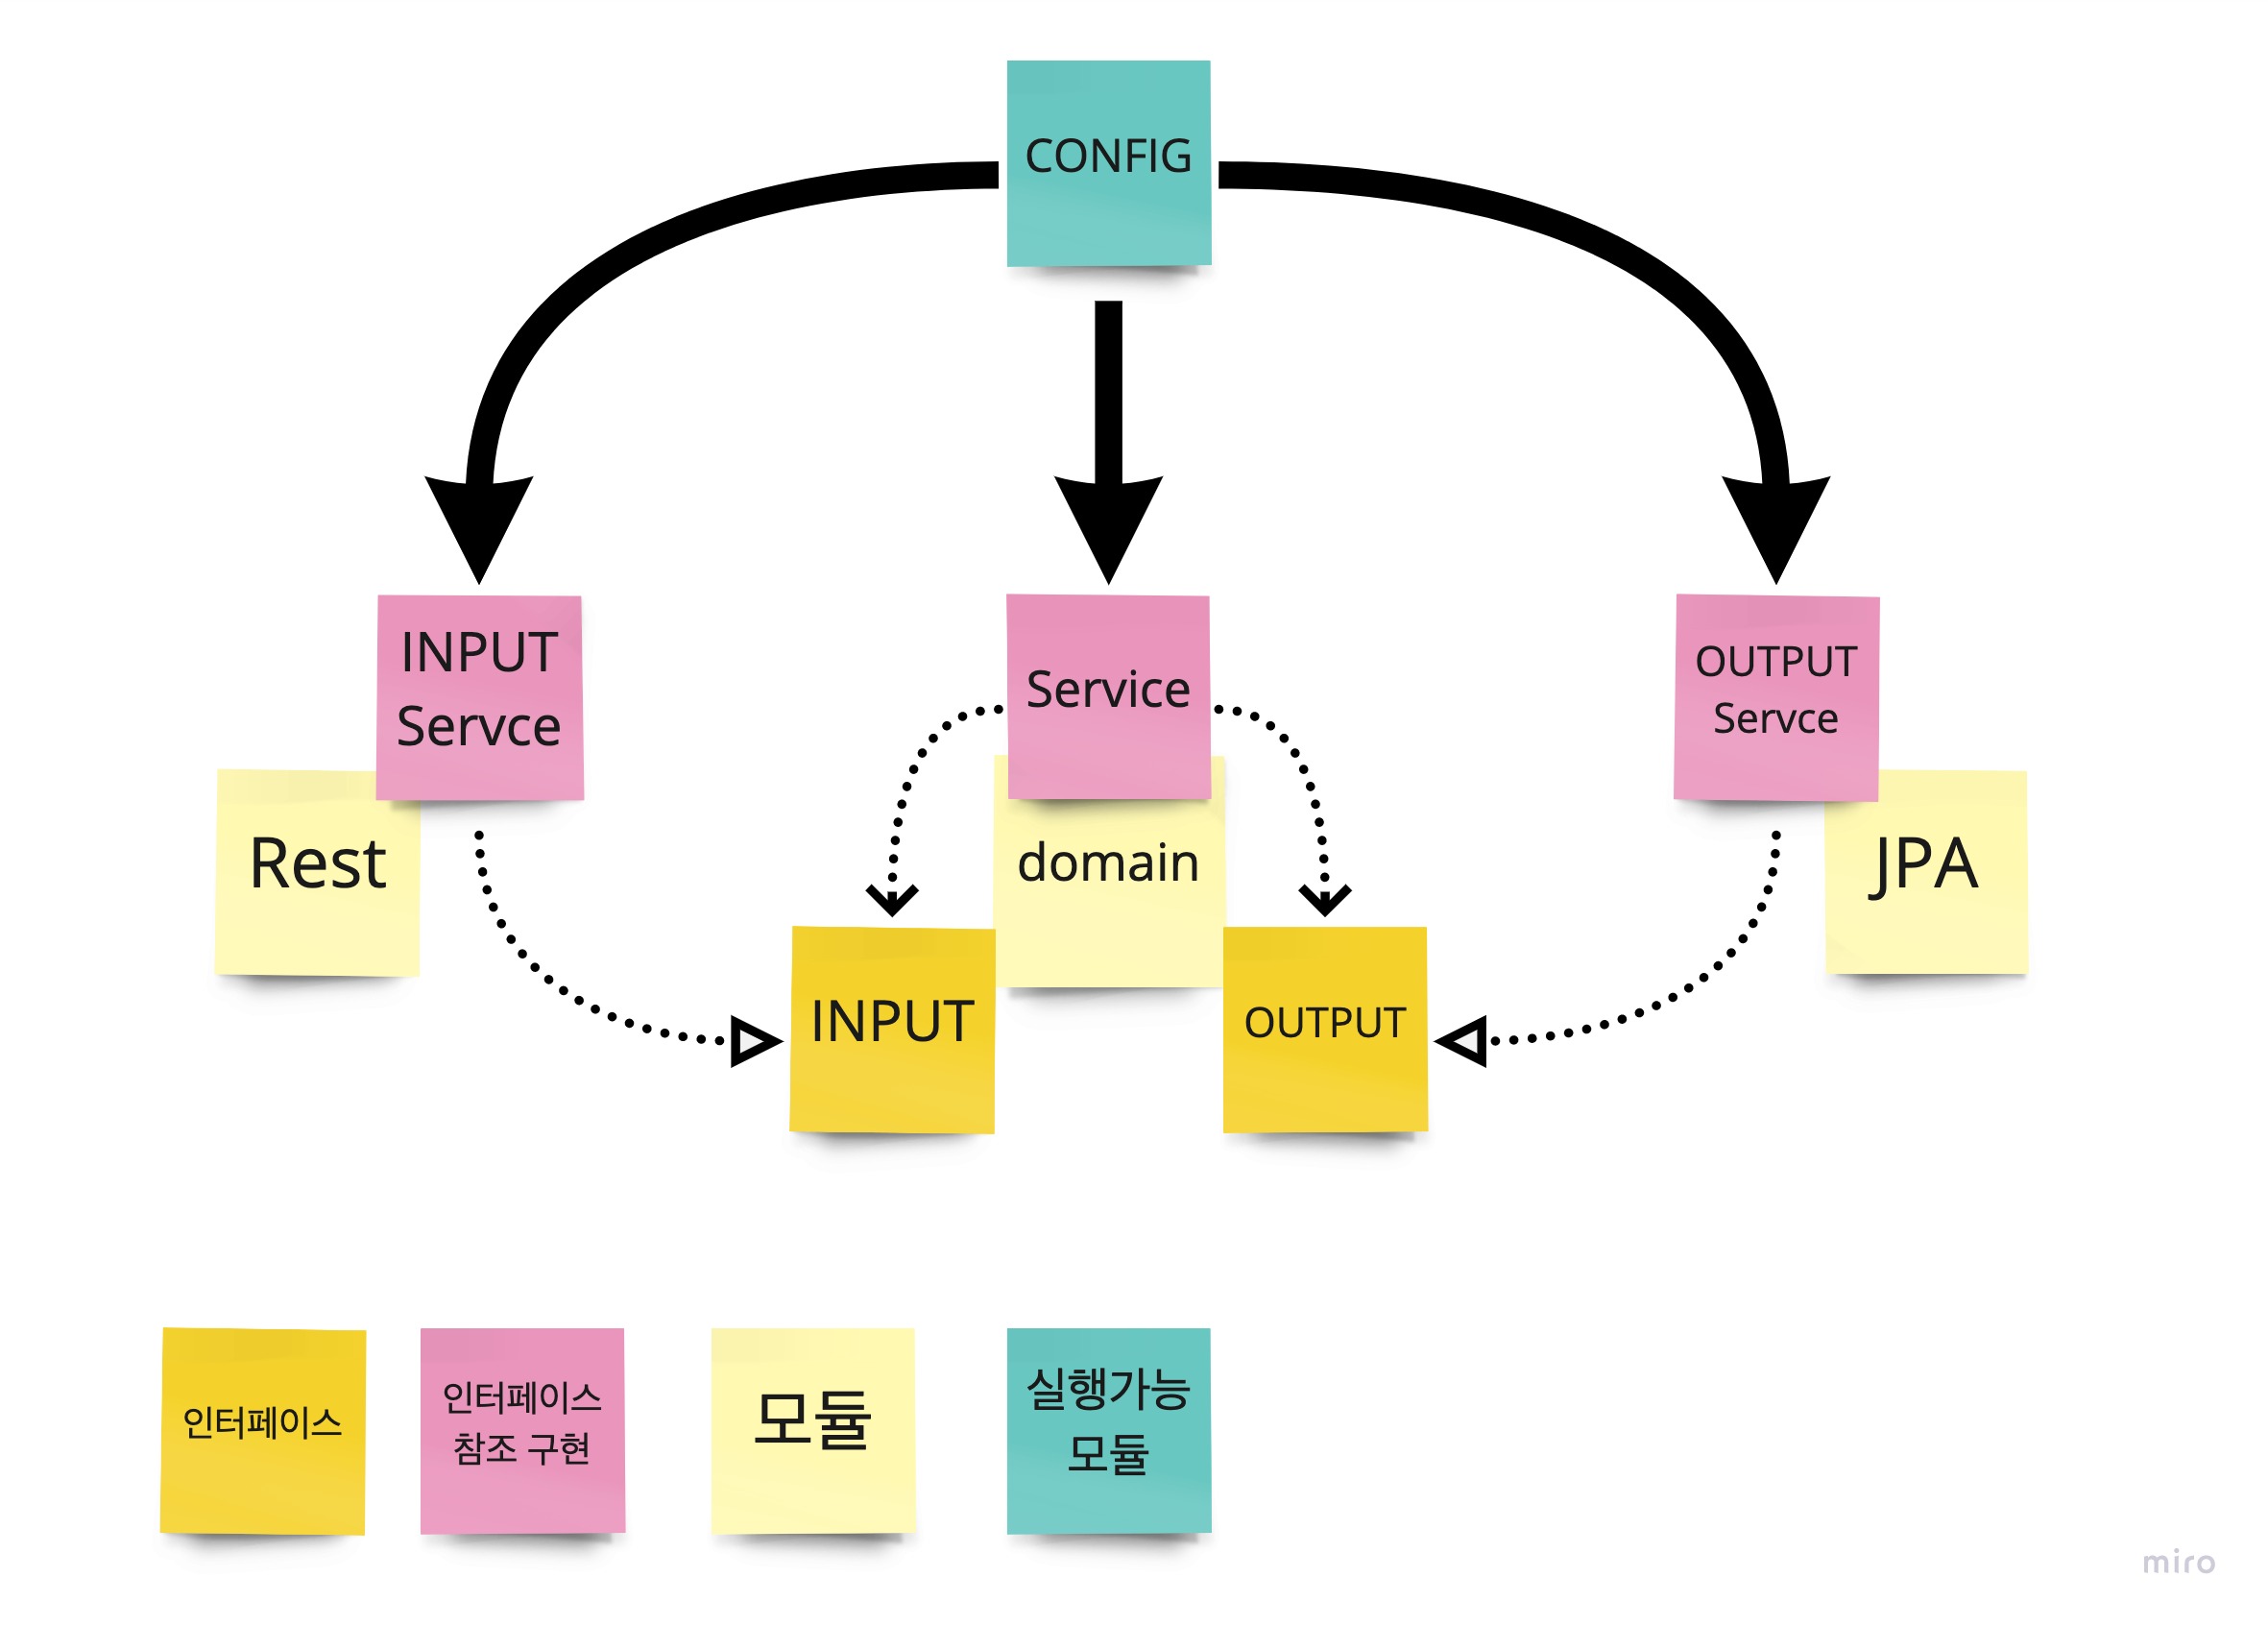
위와 같은 형태로 전체 구성이 되어 있다.
구성을 하나씩 살펴 보면 전체 모듈의 의존성은
    compileOnly "org.projectlombok:lombok:${lombokVersion}"
    annotationProcessor "org.projectlombok:lombok:${lombokVersion}"
    testCompileOnly "org.projectlombok:lombok:${lombokVersion}"
    testAnnotationProcessor "org.projectlombok:lombok:${lombokVersion}"
롬복의 내용만 걸어 놓았다.
그럼 도메인 모듈은
  implementation 'javax.validation:validation-api:2.0.1.Final'

  testImplementation 'org.hibernate:hibernate-validator:6.2.0.Final'
  testImplementation 'org.glassfish:javax.el:3.0.0'
  testImplementation 'org.junit.jupiter:junit-jupiter-api:5.7.0'
  testRuntimeOnly 'org.junit.jupiter:junit-jupiter-engine:5.7.0'
도메인 모듈의 validation을 위해 javax.validation 만 참조 하고 있고 나머지 테스트를 위한 참조가 걸려있다.
어뎁터는 2개를 구현했는데 먼저 jpa를 보면
  implementation project(':domain')
  implementation 'org.springframework.boot:spring-boot-starter-validation'
  implementation 'org.springframework.boot:spring-boot-starter-data-jpa'

  testImplementation('org.springframework.boot:spring-boot-starter-test') {
    exclude group: 'org.junit.vintage', module: 'junit-vintage-engine'
  }

  testImplementation 'com.h2database:h2'
여기서 spring을 활용하기로 선택되어서 어뎁터에서 들어가게 된다.
rest 모듈을 보면
  implementation project(':domain')
  implementation 'org.springframework.boot:spring-boot-starter-web'
  implementation 'org.springframework.boot:spring-boot-starter-validation'

  testImplementation('org.springframework.boot:spring-boot-starter-test') {
    exclude group: 'org.junit.vintage', module: 'junit-vintage-engine'
  }
여기서도 spring이 추가되어 있다.
최종적으로 해당 구현된 값을 조합하여 서버를 기동하는 configuration 모듈을 보면
  implementation project(':domain')
  implementation project(':adapters:jpa-persistence')
  implementation project(':adapters:rest')
  implementation 'org.springframework.boot:spring-boot-starter'
  runtimeOnly 'com.h2database:h2'

  testImplementation('org.springframework.boot:spring-boot-starter-test') {
    exclude group: 'org.junit.vintage', module: 'junit-vintage-engine'
  }

  testImplementation 'com.h2database:h2'
참고자료
- Alistair Cockburn hexagonal-architecture
- 작업한 코드
- 지속 가능한 소프트웨어 설계 패턴: 포트와 어댑터 아키텍처 적용하기
- spring-hexagonal
- spring-hexagonal-example
- NHNFORWARD DDD-Lite@Spring
- Ports & Adapters Architecture
- 마이크로서비스 내부아키텍처 - 2회 : 클린 아키텍처와 헥사고널 아키텍처
- 지속 성장 가능한 소프트웨어를 만들어가는 방법
- CHECKS Pattern
- wiki c2 PortsAndAdaptersArchitecture
- wiki c2 HexagonalArchitecture
- clean-architecture